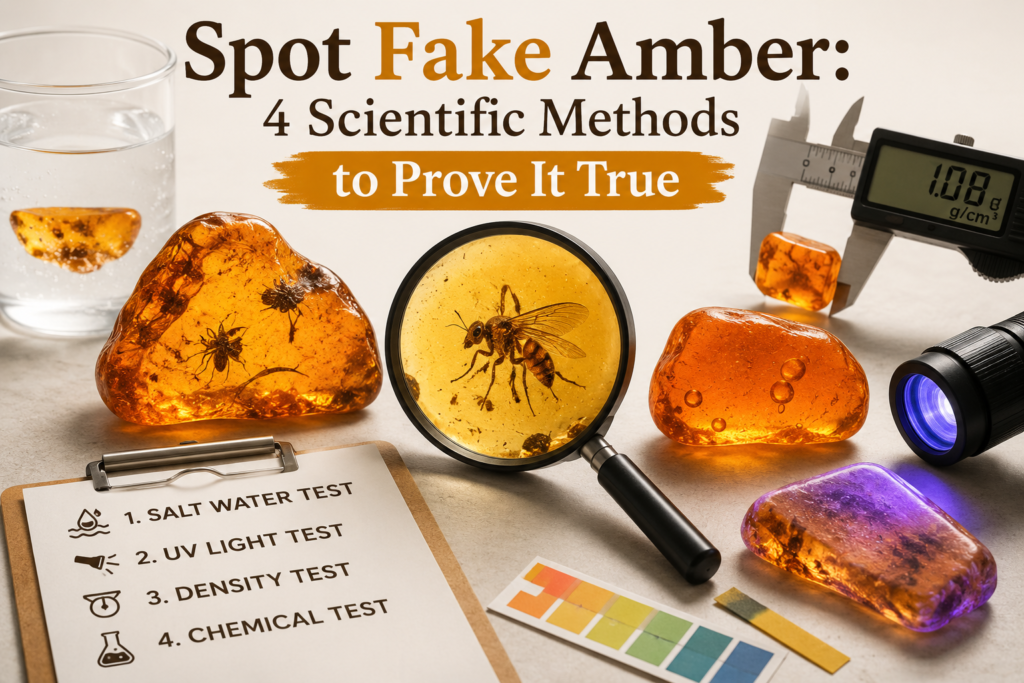
Welcome to The spot Fake Amber Guide. For thousands of years, humans have been captivated by the warm, golden glow of fossilised resin. But as its value has soared, so has the sophistication of counterfeits. Today, the market is flooded with deceptive imitations, ranging from modern plastics like Bakelite and polystyrene to cleverly treated young copal masquerading as ancient amber.
Distinguishing genuine millions-of-years-old amber from a cheap factory lookalike requires more than a casual glance. This guide arms you with reliable, field-tested testing methods—from static electricity and saltwater buoyancy tests to destructive hot-needle and UV light analysis—ensuring you can confidently verify your gems and avoid costly deceptions.
The Saltwater Float Test
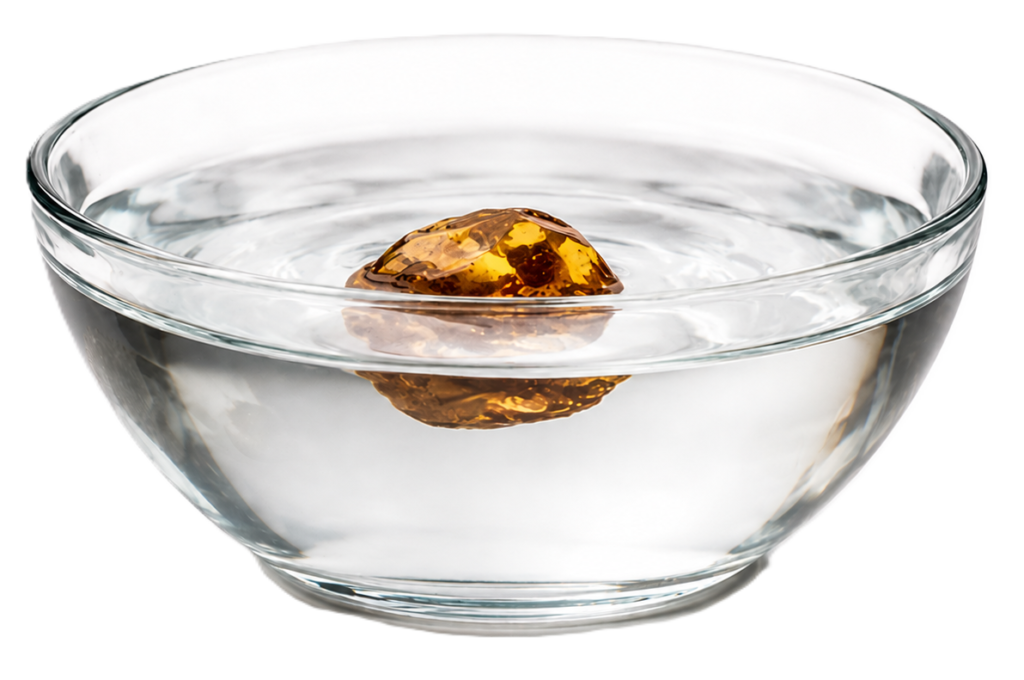
One of the simplest and non damaging test is the salt water float test. This relies on the specific gravity (density) of the items.. True amber and copal are incredibly light, with a specific gravity of roughly 1.03 to 1.10. They will sink in plain tap water but float easily in dense, highly saturated saltwater. This will isolate the most common heavy plastics (like Bakelite, celluloid, or acrylics) are denser and will sink even in heavily salted water.
What You Need
- A clean glass bowl or measuring cup
- Warm tap water (approx. 8–10 ounces)
- Standard table salt (sodium chloride)
- A stirring spoon
Step-by-Step Procedure
- Prep the Solution: Fill your container with warm water. Add 7 to 8 teaspoons of table salt.
- Dissolve Completely: Stir vigorously for a few minutes until the salt is completely dissolved and the water clears up. If salt remains crystallised at the bottom, the water is fully saturated, which is perfect.
- The Initial Drop: Gently lower your unmounted specimen into the water.
- Observe the Reaction:
- Amber & Copal: Will bob quickly to the surface and float buoyantly.
- Plastic & Glass Imitations: Will sink straight to the bottom of the glass.
- Rinse: Always rinse your genuine amber or copal in fresh tap water immediately after testing to remove residual salt crusts, then dry with a microfiber cloth.
Crucial Limitation: This test cannot separate amber from copal, as both float. It also cannot catch modern polystyrene plastics, which are uniquely light enough to float alongside authentic resins.
Diagnostic Test Matrix
To confidently verify your specimen, map your results across both tests using this quick verification checklist:
- It floats in saltwater +Amber or Copal
- It sinks in saltwater + Glass, Common Plastic (Bakelite, Acrylic) or polystyrene Imitation – try other test
| Float test results | Diagnosis | Next step |
| Floats | Amber or Copal | Test for Amber or Copal or needle test for light weight plastic |
| Sinks | Plastic, resin or glass |
The Hot Needle Test
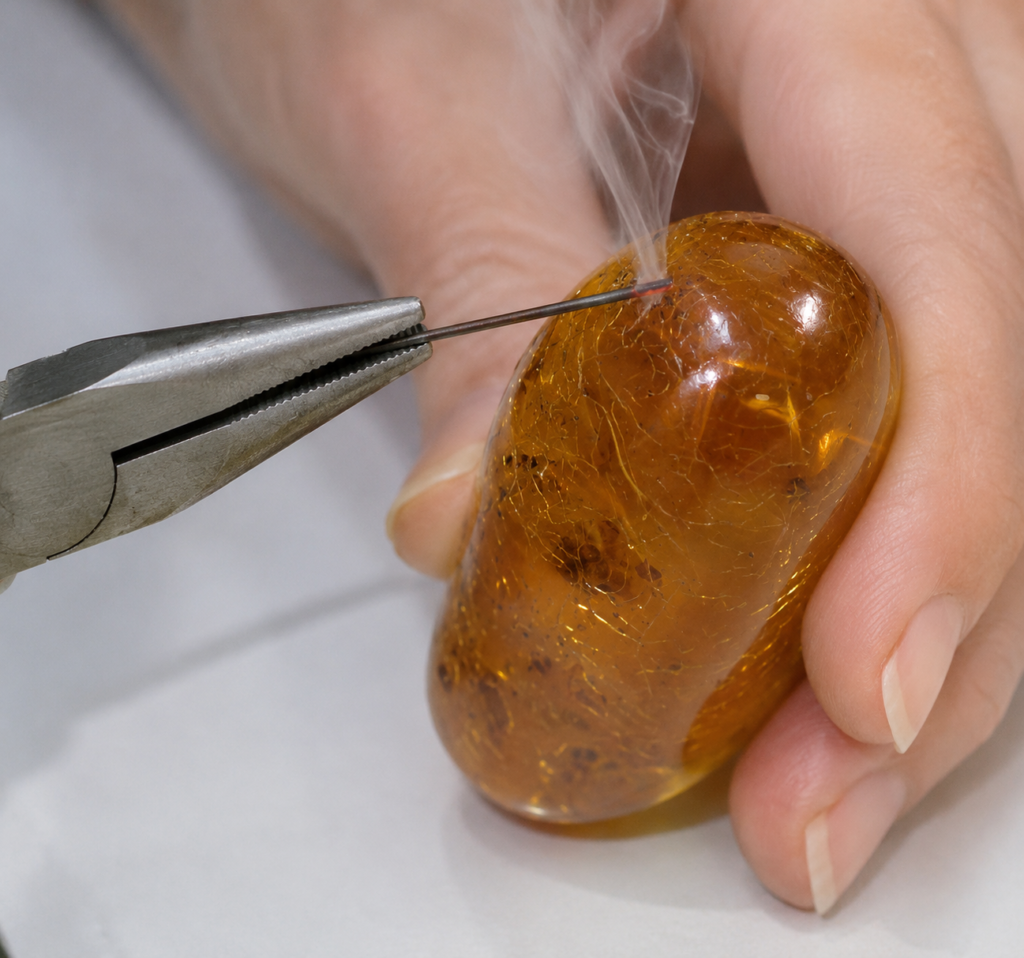
As its name implies, the hot needle test uses heat to break down volatile organic compounds inside the material, releasing a distinct aroma. Because this test is destructive (it melts a tiny pinprick into the specimen), always perform it on an inconspicuous area, such as the inside of a bead hole or the rough back of a pendant.
What You Need
- A standard sewing needle or safety pin
- A pair of pliers or heavy tweezers (to hold the needle securely)
- A lighter, candle, or gas burner flame
Step-by-Step Procedure
- Secure the Needle: Grip the dull eye-end of the needle firmly with your pliers. Never hold it with your bare fingers, as metal conducts heat rapidly.
- Heat the Tip: Hold the very tip of the needle directly in the flame for 5 to 10 seconds until it glows dull red.
- The Touch: Press the glowing hot tip lightly against a hidden, small surface of the specimen for just one second. Watch how the surface melts and smell the smoke immediately.
- Analyse the Results:
| Material | Physical Melt Reaction | Aroma Profile |
|---|---|---|
| True Amber | The needle resists slightly, leaving a tiny black or white pinprick mark. It does not pool or run. | A distinct, pleasant, clean aroma of pine resin, campfire wood, or natural incense. |
| Copal | The needle sinks in effortlessly and quickly. The resin melts, gets sticky, and leaves a noticeable gooey ring. | A bright, sweet, intensely sweet resinous smell, similar to frankincense or raw pine sap. |
| Plastic | The needle melts deeply into the material, creating a sticky, chemical crater that cools into hard, raised edges. | A harsh, acrid, chemical stench of burning synthetic plastic, fuel, or medicine. |
The Ultraviolet (UV) Light Test
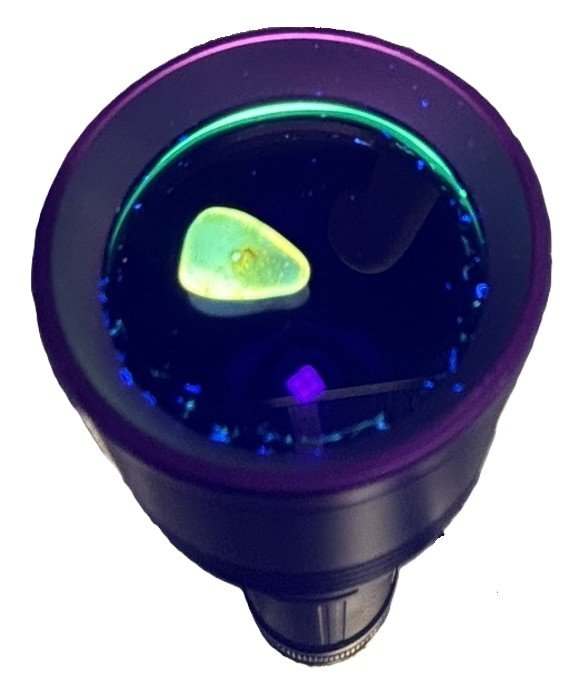
This is a completely non-destructive test. True amber and copal both fluoresce under UV light due to the organic compounds trapped inside their structures, but they react with noticeably different intensities and colour profiles.
What You Need
- A UV torch. For the best results, use a 365nm (nanometer) long-wave UV light. Standard 395nm torches work, but they emit too much visible purple light, which can mask the subtle fluorescence of the resins.
- A completely dark room.
Step-by-Step Procedure
- Turn off all ambient lights until the room is pitch black.
- Shine your UV light directly onto the clean, unmounted specimen.
- Observe both the surface colour and the intensity of the glow.
Analysing the UV Results
| Product | UV reaction | Notes |
| True Amber | True Amber: Will emit a strong, bright, cloudy fluorescence. Baltic amber typically glows a distinct milky yellow, cream, or soft greenish-blue. Dominican amber can flash an intense, electric sky-blue or vivid green. The fluorescence appears deep and structural | |
| Copal | Fluoresces much weaker and looks noticeably different. Because it is younger and less chemically altered, it typically exhibits a dull, faint white, pale yellowish-green, or dusty grey glow. It lacks the vibrant, milky depth seen in ancient amber. | |
| Plastic/Glass Counterfeits: | Most cheap plastics do not fluoresce at all and will simply reflect the dark purple light of the torch. | A few modern plastics are treated with fluorescent dyes to glow bright blue, but they will fail the acetone test below. |
- True Amber: Will emit a strong, bright, cloudy fluorescence. Baltic amber typically glows a distinct milky yellow, cream, or soft greenish-blue. Dominican amber can flash an intense, electric sky-blue or vivid green. The fluorescence appears deep and structural.
- Copal: Fluoresces much weaker and looks noticeably different. Because it is younger and less chemically altered, it typically exhibits a dull, faint white, pale yellowish-green, or dusty grey glow. It lacks the vibrant, milky depth seen in ancient amber.
- Plastic/Glass Counterfeits: Most cheap plastics do not fluoresce at all and will simply reflect the dark purple light of the torch. (Note: A few modern plastics are treated with fluorescent dyes to glow bright blue, but they will fail the acetone test below).
The Acetone Spot Test
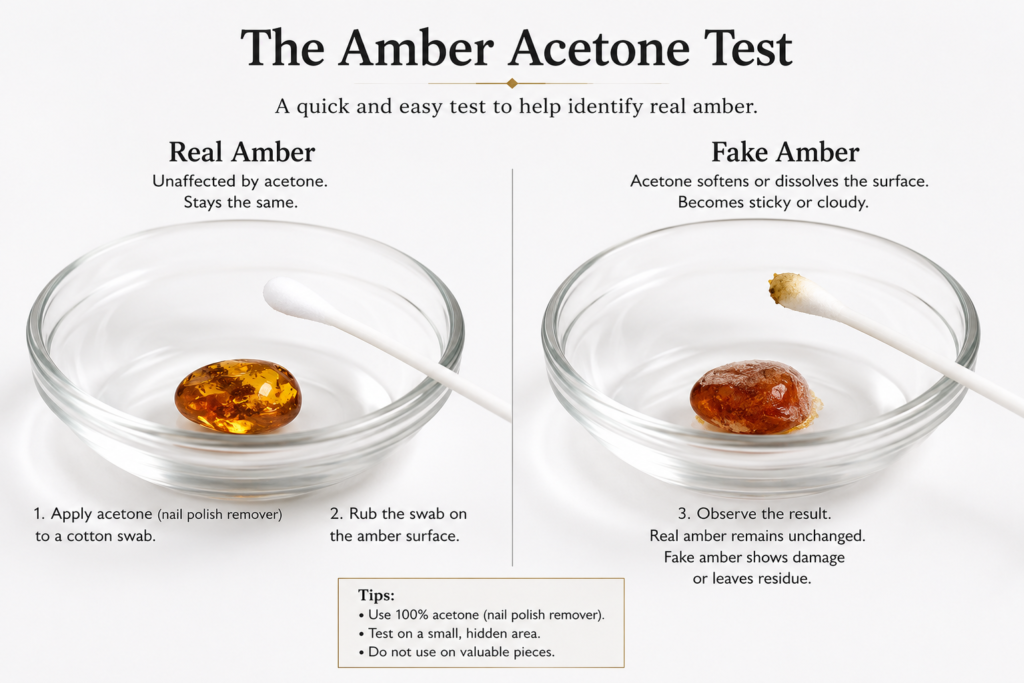
This test relies on chemical solubility. Because copal has not completed polymerisation, its molecular chains are loosely linked and highly susceptible to solvents. True amber is fully polymerised and chemically inert to short exposures of standard solvents.
Warning: This test is surface-destructive to copal and plastic. Always apply the solvent to a tiny, hidden spot (like the back of a clasp or near a drill hole). Do not use this test on antique or highly valuable carved artefacts.
What You Need
- Pure acetone (available at hardware stores or as 100% pure cosmetic nail polish remover). Do not use diluted nail polish remover.
- A cotton swab (Q-tip).
Step-by-Step Procedure
- Locate an inconspicuous, hidden area on your specimen.
- Dip the tip of the cotton swab into the pure acetone. Shake off any excess so it is damp, not dripping.
- Press the damp swab firmly onto the chosen spot and hold it perfectly still for 15 to 30 seconds.
- Lift the swab away and immediately test the surface with your fingertip.
Analysing the Acetone Results
- True Amber: The surface remains completely hard, smooth, and unaffected. The cotton swab will slide off cleanly, leaving no dullness or mark.
- Copal: The acetone instantly dissolves the surface layer. The spot will feel tacky, sticky, or gummy to the touch. The cotton swab may stick to it, leave fibers behind, or strip away the polished sheen, leaving a dull, matte fingerprint mark.
- Plastics: The reaction varies by plastic type. Celluloid or Acrylic plastics will quickly dissolve, becoming sticky or melting just like copal. Bakelite, Casein, and Glass will remain completely unaffected, mimicking true amber.
Combined Verification Summary
By combining these two non-destructive or low-impact tests, you can rule out most imitations:
| Material | UV Light Reaction (365nm) | Acetone Swab Reaction |
| True Amber | Bright, milky yellow, green, or electric blue | Completely unaffected (remains hard) |
| Copal | Faint, dull white, grey, or pale yellowish-green | Becomes sticky, gummy, and dulls instantly |
| Soluble Plastic | No glow (or artificial neon blue) | Melts, softens, or turns sticky |
| Bakelite/Glass | Dull dark brown, dark green, or no glow | Completely unaffected (remains hard) |
Non scientific test to Spot Fake Amber
The refrigerator test is a simple way to observe one of amber’s unique physical properties—its ability to retain warmth. Place the amber in a refrigerator for around two hours, then remove it and hold it in your hand. Genuine amber typically warms up quickly and feels noticeably less cold than glass, plastic, or many stone imitations.
Likewise, when worn against the skin, real amber readily absorbs body heat and soon feels warm to the touch, matching your natural body temperature. In contrast, imitation amber made from glass or synthetic materials often remains cool for longer after being removed from the refrigerator or when first handled.
Important: While the refrigerator test can provide a useful indication, it should not be relied upon as a definitive method for identifying genuine amber. For the most accurate results, combine it with other tests such as UV fluorescence, the saltwater float test, or professional gemological analysis.